
Felt Ornaments
- Grace Manganaro

- May 28
- 3 min read
For Christmas this past year, I went home which was so lovely! The year before, I spent it with my boyfriend and his family, and missed them this year, so I wanted to make sure I made them a little something. I tried to make one matching one for everyone (grouped couples as one) and a more personal one as well.
For the matching one, I made a little sweater-shaped ornament with their initial (or last name initial) on it. I added embroidered details on the sleeves, wrists, neckline, and bottom. Each letter was cut out separately and sewn on. I tried to make each sweater as unique as possible and thought about what fit their personality best.

Each person/couple also received a personalized one! His mom, stepdad, oldest sister, and her husband are very religious, so I wanted to make something that would honor that around this time of year. For his mom and stepdad, I made a beaded cross ornament. I made a beaded dove for his oldest sister and her husband because, to my understanding, the dove is a symbol of the Holy Spirit and peace.
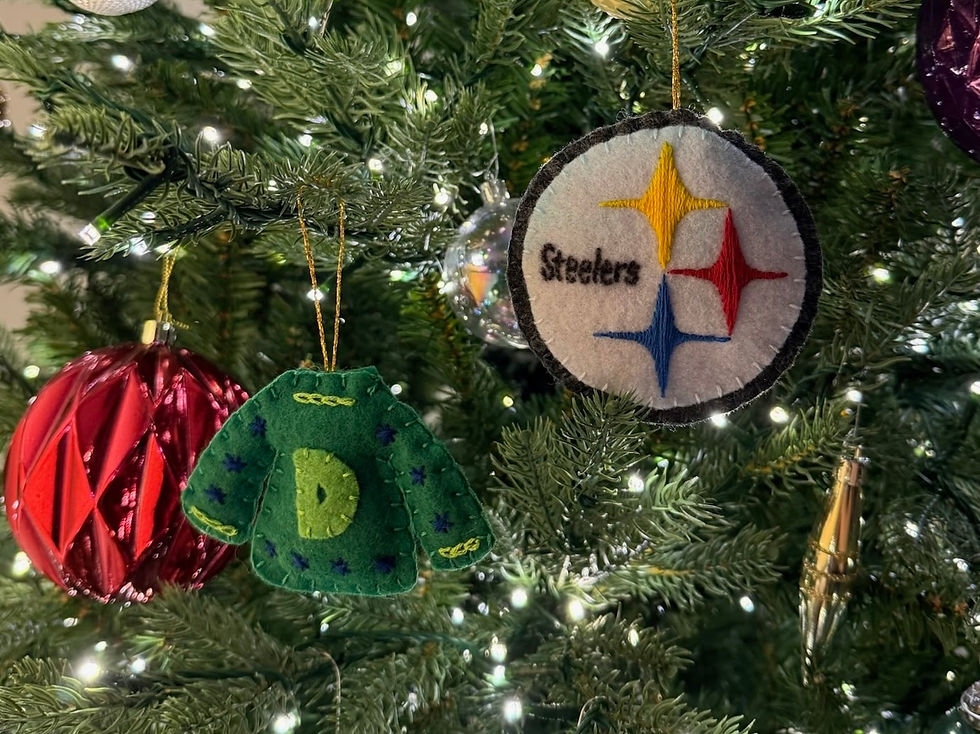
His dad is a huge Steelers fan, so I embroidered the logo as his ornament. I did have to write out 'Steelers' in fine-tip Sharpie. I was concerned that the space I had to embroider wouldn't be enough and that it would end up looking messy so I folded and wrote on it. The part that makes me laugh when looking at it is you can tell I figure out what I'm doing as I continue to make the stars.

For his middle sister, I made a little onesie because she was pregnant with her first! I added a bear because that was the theme of their nursery and the estimated due date on the bottom. I only went with the month in case the date was wrong but didn't pay attention to how it was very early in the month. Sure enough, the month is also now wrong lol. At least I didn't write 2025 by accident!

For his youngest sister, I made a cute little beaded marg with salt on the rim and an embroidered lime. She's normally the life of the party on family vacations and has made me a good strong drink or two before. It was also her birthday a the month before and we had some tequila together which I don't normally do. The stem ended up a little funky because I tried to squeeze too
many beads on there, but I like to think
it looks like a stylistic choice.

Last but certainly not least, his older brother. Mind you, these projects are the first time I have actually embroidered. He was the hardest to decide on what to do because his interests are more niche and I wanted to do something that would look cool, felt personal, and that he would appreciate. Ben gave me the idea to do something with RocketLeague. At first I 100% thought it would be too difficult but when nothing else met the standards I had hoped to meet, I know what I had to do.
First, I looked at a picture of the car and dried to draw it in basic shapes that I later wrote the colors in. I cut out the car itself and traced the outline onto what would become the background for the car. From there, I cut out each shape one at a time from my drawing, traced it out onto the felt, added that shape to the background piece, and tapped the shape back onto the drawing. Once I had every piece cut out and I knew where it would go, it was time to sew.
From using tools like Photoshop and ProCreate for so long, I'm used to thinking about layers when creating. This came in handy for this piece. I would sew on all background pieces first like the black of the windows and the one headlight shield. For certain parts like the wheels, I embroidered before I sewed them on. For other parts, like the grey details, I added once everything was already sewn onto the background. For all parts I sewed on, I tried to use a matching string color so the stitching wouldn't be too noticeable.
For all pieces, I cut a second piece out at the beginning so once I was done embroidering the front piece, I would use the blanket stitch to add the backing on but leave a little part open. I then put a little stuffing in before sewing it up completely.
.


Comments